- certbot安装
- 创建证书
- 证书更新方法
- 添加crontab自动执行
- 还未过期要更新ssl,用certbot certonly
- 查看所有证书
- 删除本地证书
- 查看letsencrypt账号
- gitlab ssl证书设置与更新
let’s encrypt网站:https://letsencrypt.org/
certbot网站:https://certbot.eff.org/
certbot安装
如果已安装,可跳过
安装certbot
1 | apt update |
验证是否安装成功
1 | certbot renew --dry-run |
输出
1 | Saving debug log to /var/log/letsencrypt/letsencrypt.log |
创建证书
一键式操作
1 | certbot --nginx |
该命令会直接搜索nginx有多少个域名,然后让你选要让哪些成为https的,然后自动配置nginx.conf文件,自动验证,最后自动填充https的字段。
自动添加的字段:
1 | listen 443 ssl; # managed by Certbot |
之后更新用如下命令即可。
1 | certbot renew |
静态网站(已知文件目录)
1 | certbot certonly --webroot -w /var/www/example -d example.com -d www.example.com |
使用certbot,创建后的目录会在命令行提示出来,在nginx中配置即可
certonly :仅创建(刷新)证书,不安装
--webroot :在服务器根目录创建.well-known文件夹,并通过域名访问这个文件夹,进行验证
-w, --webroot-path :指定服务器根目录的本地路径
-d :域名
证书更新方法
所有证书更新
1 | certbot renew |
若还未到期,则会跳过。例如今天是2024.12.13,执行renew,得到以下输出:
1 | The following certificates are not due for renewal yet: |
指定域名
1 | certbot --nginx certonly -n -d example1.com,example2.com -d example3.com |
添加crontab自动执行
编辑
1 | crontab -e |
以下命令:每隔90天的凌晨2点15分执行renew,并且执行后重载nginx
1 | 15 2 */90 * * certbot renew --post-hook "systemctl reload nginx" |
还未过期要更新ssl,用certbot certonly
1 | certbot certonly --webroot -w 静态文件路径 -d 域名,多个用,隔开 |
如果还未过期,需要二次确认renew还是replace
查看所有证书
1 | certbot certificates |
删除本地证书
1 | certbot delete |
然后二次确认(如果不小心创建错了,或者已经不再用了,才需要删除,否则尽量别动)
查看letsencrypt账号
1 | certbot show_account |
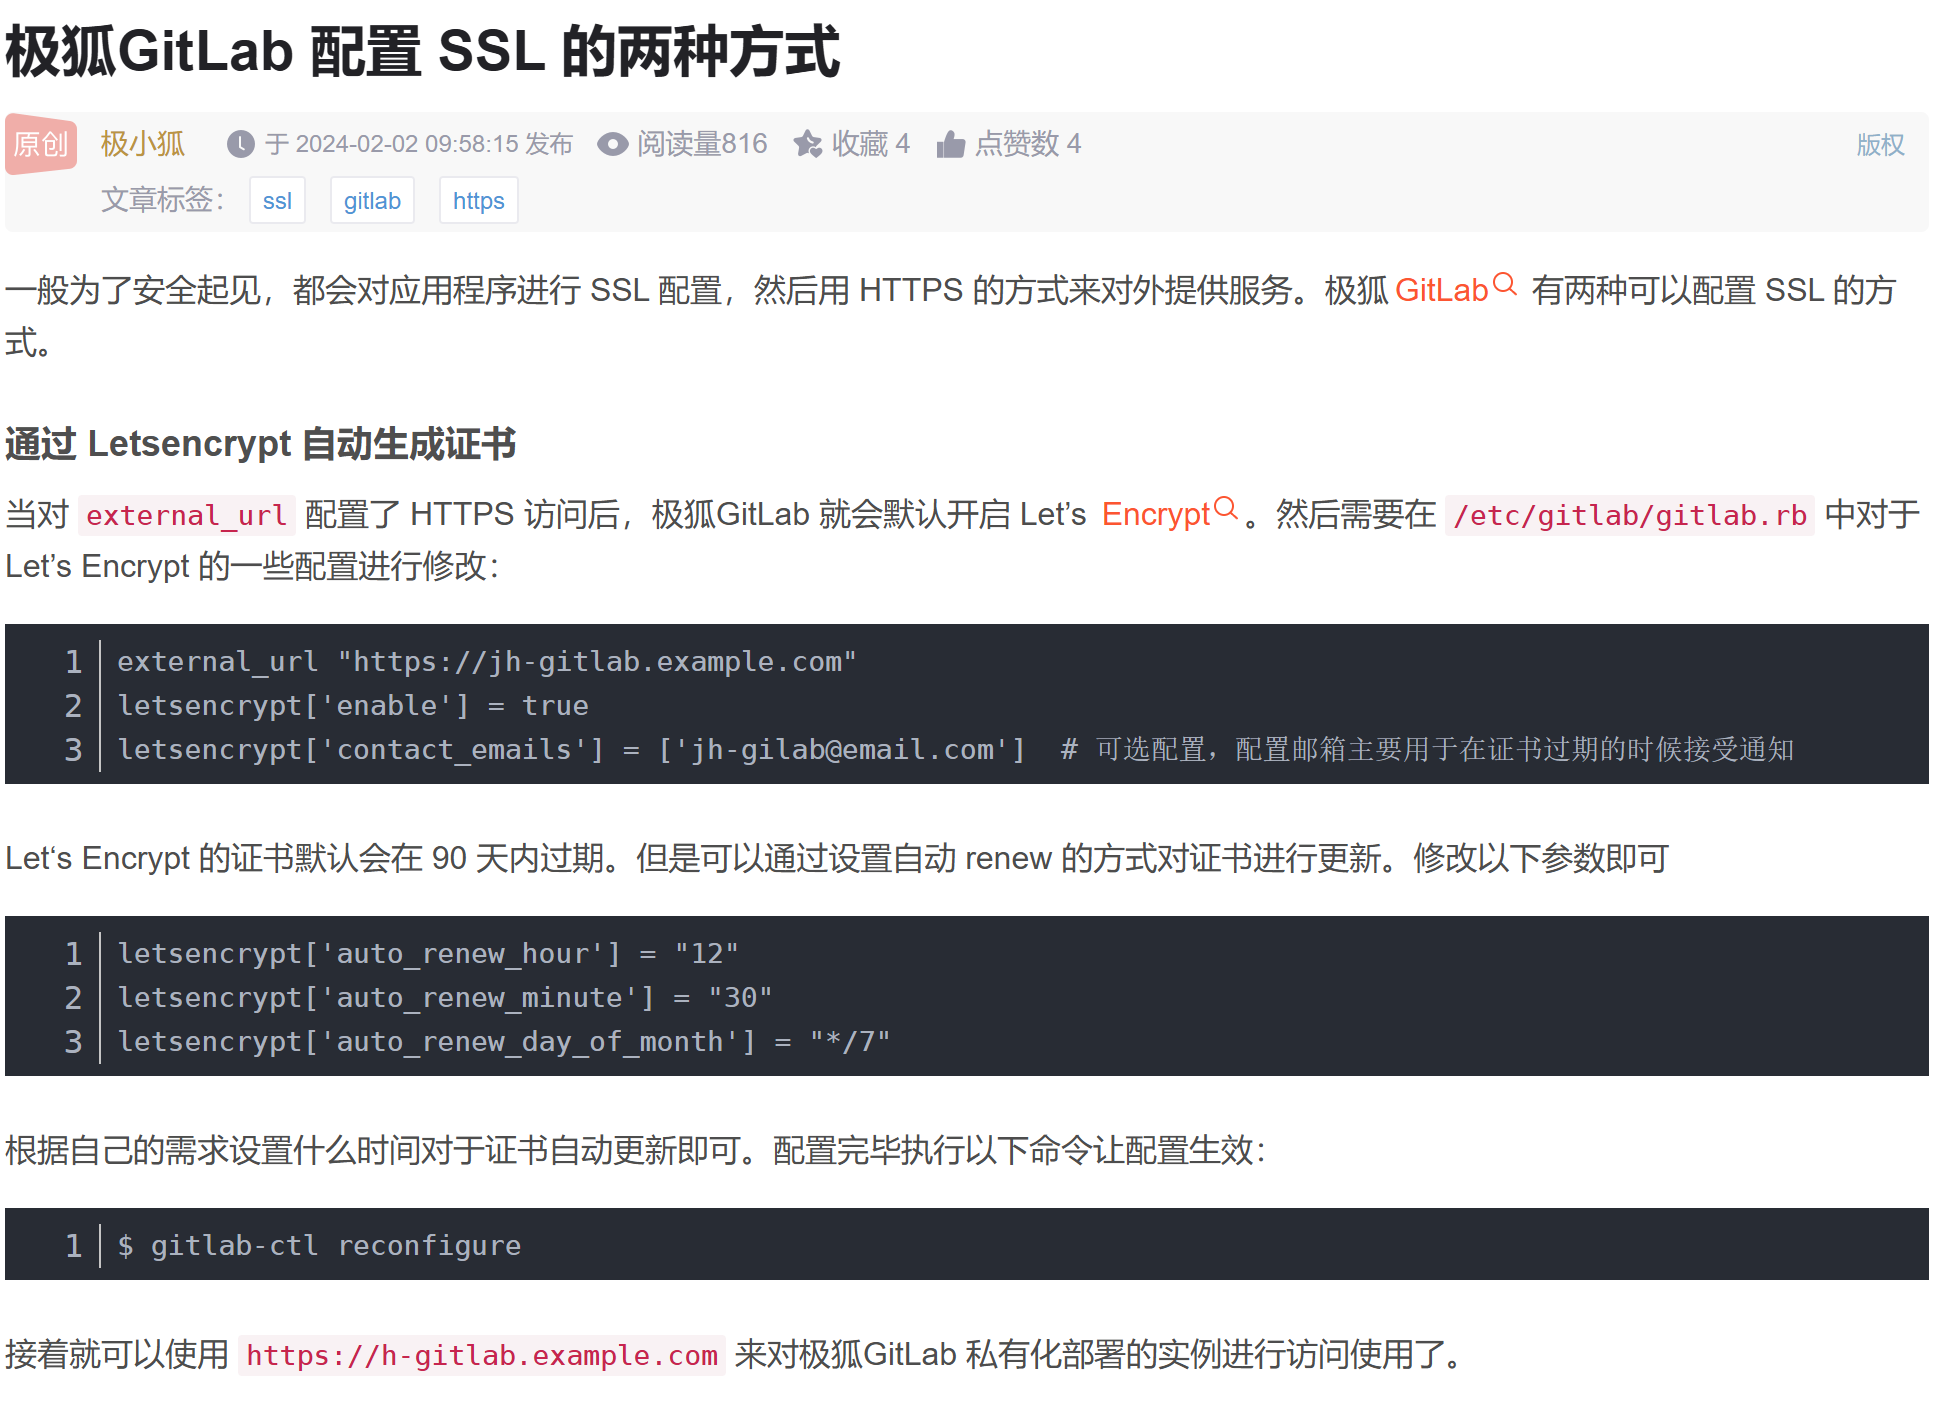
gitlab ssl证书设置与更新
极狐gitlab内置方法
极狐gitlab内置了lets encrypt的配置、自动生成,只需要修改/etc/gitlab/gitlab.rb下的配置,即可完成
最后的让配置生效的命令需要进入容器后执行。
容器镜像:registry.gitlab.cn/omnibus/gitlab-jh:latest
手动生成证书方法
创建时需要在阿里云DNS创建解析记录,然后上传到SSL证书中心,最后在cdn管理控制台的https配置中选择证书。
1 | certbot certonly --manual --preferred-challenges dns-01 -d <gitlab域名> |
certonly :仅创建(刷新)证书,不安装
--manual :交互式获取证书,或使用命令行脚本
--preferred-challenges :认证方式列表,多个之间用逗号隔开
-d :域名